This article will show you how to tunnel your locally running website out to the world using ngrok.
Introduction
You have been working on a local version of your express app that runs smoothly on your http://localhost:8080. Your client is asking to see what progress has been made to the website and you don’t necessarily have hours to set it up on a cloud service provider.
This is one of the cases where ngrok comes in handy. It allows you to redirect your local traffic to a public URL accesible anywhere in the world. Let’s get started.
Installation
I have tried to install ngrok with brew, but it didn’t work (I ended up with an old version). Download it from the website.
Unzip the package and put it somewhere where ou can easily access it. I am on OS X and I have put it in my Applications folder so I can access it with:
$ /Applications/ngrok -help |
Sign up and get a authentication token
Sign up for a free account with ngrok and get your auth token. Install the token with authtoken:
$ ./ngrok authtoken abcde1234 |
Create your first tunnel
I am testing mine with my hexo blog running on http://localhost:4000/ but you can use whichever port you want, even your standard port 80.
Run this command (replace the port number with yours)
$ /Applications/ngrok http 4000 |
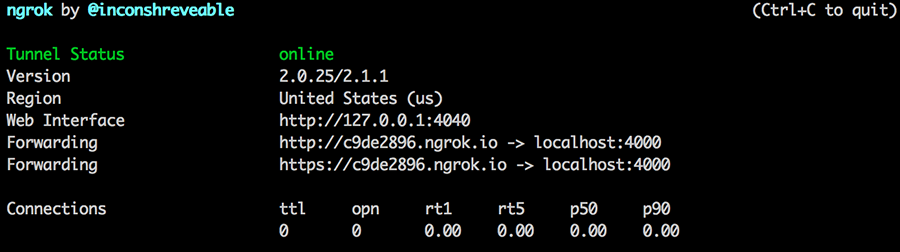
The Tunnel Status should say online and you will get a Forwarding URL that looks something like http://c9de2896.ngrok.io.
Open that URL in your browser and look at all your website’s ressources being redirected from your local through ngrok.io.
You can now use that URL and share it with you friends and clients.
