In this multi part tutorial, you will learn how to create an Hexo Theme from scratch.
In Part 1 and Part 2, we have created all the pages of the blog. In this last section, we are going to add Disqus comments to our posts, implement Google Analytics and complete the sidebar’s widgets.
Links to other sections
- Part 1: Setting up the project and creating the blog’s main index page
- Part 2: Finishing up the remaining pages
- Part 3: Wrapping up with Disqus comments, Google Analytics and the widgets
Disqus Comments
I have already written a blog post on how to implement Disqus comments in Hexo. Please refer to it if you need more information but here is how to do it:
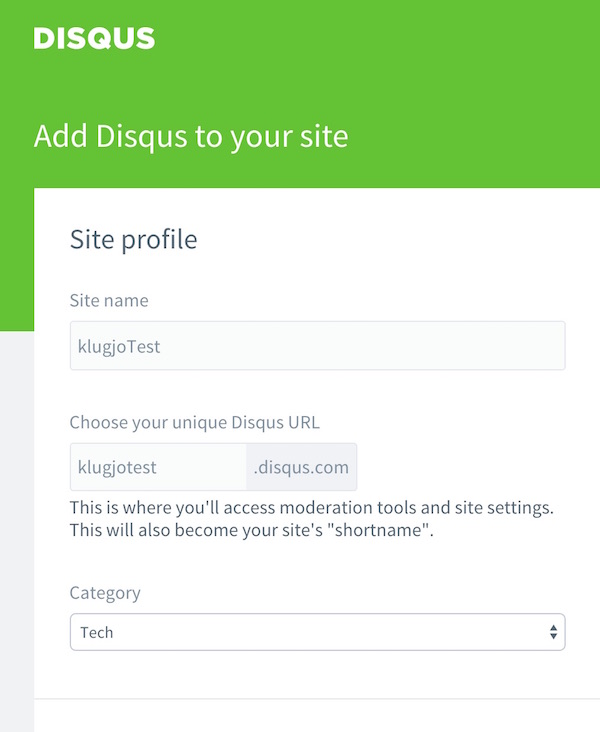
The first step is to get a Disqus UID to test the comments, you can get it from your Disqus account here:
Then there are three things that need to be implemented, the theme config for disqus, the comments placeholder and the Disqus script. Let’s get going.
Theme config
We want the Disqus UID to be configurable, let’s add an entry to the theme’s _config.yml:
# Disqus Comments Shortname |
Comments placeholder
We are going to add comments to our page and post details pages. As always, let’s create a new partial view layout/_partial/comments.ejs and insert it at the end of our layout/_partial/article-full.ejs.
<div class="blog-post"> |
Disqus is exepecting a div#disqus_thread element, here is the official code from the documentation
<div id="disqus_thread"> |
Let’s integrate this into our comments partial:
<% if(page.comments && theme.disqus_shortname){ %> |
First we are checking that comments are ON and that our disqus UID has been set. Then we are placing the Disqus markup code inside a container.
Here is the CSS code I have used for that container:
.blog-post-comments { |
Disqus script
Before we can test, we need to add the Disqus script which contains all the magic. Place it with all the other scripts at the end of layout/_partial/after-footer.ejs
<!-- Disqus Comments --> |
The script is taken from the docs and the Disqus UID was parameterized.
Go ahead and test that everything is working as expected.
Google Analytics
Google Analytics implementation follows the same principle as Disqus so I will move through it quickly.
I have another blog post on that subject.
Setup the tracking ID in the theme’s config
Get your google analytics tracking ID from your account and add a new entry to the config.
# Google Analytics Tracking ID |
Create a new partial
Create a new partial view layout/_partial/google-analytic.ejs
<% if (theme.google_analytics){ %> |
This is a simple copy paste of Google Analytics Tracking code with a parameterized ID.
Integrate the partial
We want our tracking code on all pages, and there is not best place to put it on a page. Let’s add it at the end of our <head></head>:
<head> |
And we are done !
Widgets
At the moment our widgets are just a bunch of hardcoded, static HTML inside sidebar.ejs. Let’s fix that.
Configuration
Let’s start with the configuration.
We are going to create two widgets, one About widget and one Tags widget. I want the JavaScript object version of the config to look like
{ |
This is how it translates to YML inside our theme’s configuration file:
# Widgets List |
Sidebar Code
Our sidebar which is the placeholder of all our widgets, will need to iterate through all the widgets in the configuration and render them appropriately:
This what the sidebar EJS template now looks like:
<% for(var widget in theme.widgets){ %> |
First Widget: About
Let’s build our first widget inside a new partial called layout/_partial/widget/about.ejs.
The code is copy pasted from the original bootstrap template and the text now comes from the configuration.
<% if(theme.widgets.about){ %> |
Second Widget: Tags
Let’s do something slighty more advanced for this widget. Display a paragraph with all the tags used in the blog, separated by whitespaces and with a font size proportional to the number of times the tag is used.
Here is the code in layout/_partial/widget/tags.ejs
<% if (theme.widgets.tags && site.tags.length){ %> |
site.tagsgives us access to all the tagssite.tags.sort('name')sorts all the tags by alphabetical orderitem.pathcorrespond to the relative URL to the archive page for that tagitem.posts.lengthgives you the number of time a tag is useditem.nameis the Tag label
I chose *13 + (tag occurence * 2)* in pixels (capped at 30px) for the font-size but feel free to use what you want.
The End
That’s the end of this tutorial, I hope you have learnt something interesting from it.
Here are a few things you can do if you want to develop it further:
- Finish the implementation of the head by parameterizing the
<title>and all the Open Graph properties. - Add more widgets, for example a search widget or a recent posts widget.
- Run Hexo Theme Unit Tests to make sure that everything is in order.
- Publish your theme on the hexo website’s theme gallery.
- Check out my other Hexo tutorials to improve your blog.
- Check out hexo-theme-bootstrap-blog which is an implementation of the same bootstrap template.
- Implement your own theme from scratch.
Thanks for reading ! Really appreciate your comments, corrections, suggestions in the comments.
